A campaign is a card or series of cards that are saved in your SendOutCards account so you may use them again and again. If you are not familiar with campaigns, watch this short video: How to Create and Send a Campaign.
From your Main Menu Page, click on CREATE A CAMPAIGN. Name your campaign and check that the default address is how you want it. Note: If you change the default address, scroll to the bottom of the page and click on Save Campaign. That button saves any changes you made to that particular page.
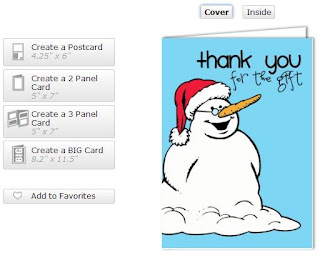
Click on the button that says CREATE A NEW CARD FOR THIS CAMPAIGN. Continue through the card 1 page (this is here for campaigns with multiple cards like a drip campaign) to get to the Card Catalog. For a Christmas Thank You Card, I click on the EXPRESSION category, then THANK YOU sub-category and then GIFT sub-category. My favorite card is the snow man card with the inside message "It was really cool!" Isn't that a cute message!!

Once you find a card, click on it and choose Create a Two Panel Card. On the edit page, write a simple message that fits for most everyone. When you are writing a lot of thank you cards, you usually have a similar message in each card. This is where you might briefly describe your holiday and say you loved your gift. Be sure to leave room on your card for a personalized message about how you might use the gift (which you will add later). Your simple message that you write just ONCE on the campaign card helps you to write a wonderful note to everyone; all your heartfelt thank you cards get done without getting writer's cramp!
You may use the INSERT NAME feature on the text box tool bar to have the recipient's name automatically populate on each card. Example: By Choosing Insert First Name, whatever is in the first name cell of your recipient's Contact Page (whatever shows up on the envelope page of the Card Editor) will populate on the inside of the card. Lastly, sign your card. If you don't have your handwriting font in your system yet, it is fun to make your signature look different by choosing a different color or font.
Click Print Preview to see if your alignment and margins look correct and then click CONTINUE then, CONTINUE WITHOUT GIFT until you get to and click the SAVE CARD, GO BACK TO CAMPAIGNS button.
YOU DID IT; you created a simple card to use over and over again! You may even add photos inside the card of you opening the gift or if you prefer, create a PicturePlus card with your Christmas photos . . . there is a tutorial on that of course (HELP section on your Main Menu Page red line: How to Use PicturePlus 2.0)! Remember, you may also make this card a postcard to save on postage . . . lot's of choices!
To send this card to someone who gave you a gift, find the person by going to FIND A CONTACT under CONTACTS on your Main Menu Page Red Line. From their Contact Page, select from the drop down box at the top of the page the campaign card you just created and click on SEND CAMPAIGN TO CHECKED. SendOutCards will ask permission to continue after telling you the cost. Click CONTINUE.
IMPORTANT (to make each thank you more personal): To add a special note about this particular present, find the card in your Card History and edit it. Warning: When you edit a card, you must continue through all the pages and click SEND CARD again to send that edited card. It might feel as though you are sending a second card but you are just telling SendOutCards that you are serious about the changes that you made to that particular card. Another warning: Make all changes to sent cards before 12:00 midnight Mountain Standard Time since that is when our cards get pulled for processing.
